Monday, July 29, 2013

Vintage Dress Adventures

I worked with my first vintage pattern last weekend.  It was actually a pretty simple affair, but I did notice the instructions were very minimal.  It basically told me to sew it together and what order to do it in.  Luckily, I was familiar with basic construction so it wasn't a big deal.  It could have been worse, though.  I have another pattern that has no markings on it except for different sized holes.  I assume those are for marking darts and other things, but I'm still researching before I tackle it.

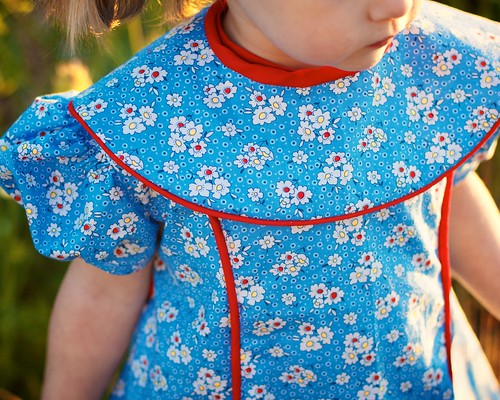
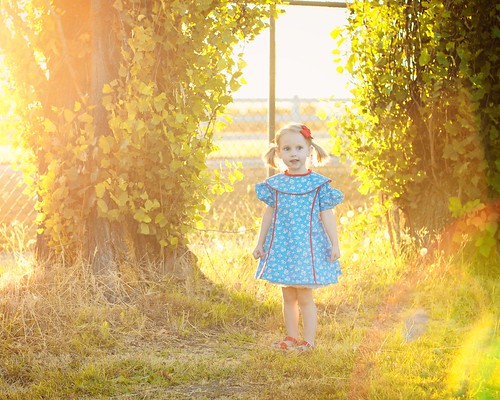
The dress I made is a size 2 toddler dress from what I believe is the mid 50's.  It's a very cute dress and I used vintage print for it as well.  The fabric is a reprint feedsack from Windham Fabrics.  I'd had the fabric in my stash for over a year.  It was so hard to cut into it, but I'm glad I did.


Vintage Dress

When I tried the finished dress on, my husband said he didn't like the collar.  I wasn't sure how I felt about it, so I pulled it off, bound the neck and the collar separately and added a couple snaps to the dress.  Now the collar is detachable!

Vintage Dress

Vintage Dress

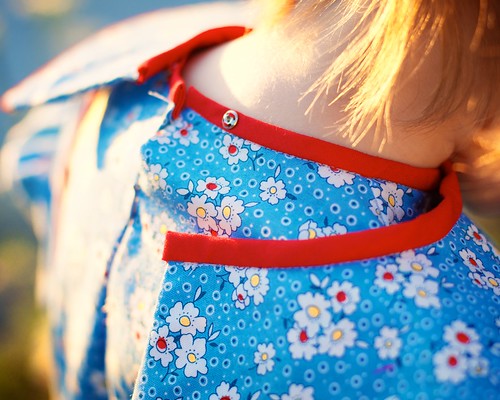
The more I see it with the collar, the more I like it.  It helps balance the wide set puffy sleeves.  It's very cute without the collar too, though.

Here is a progress shot of the pattern and the layout on my beautiful, beautiful fabric.  I still can't believe I cut into it!  Butterick 8846


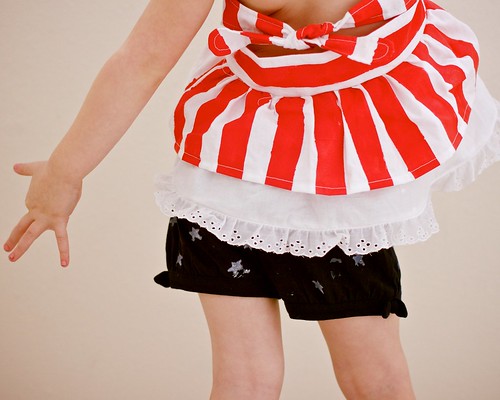
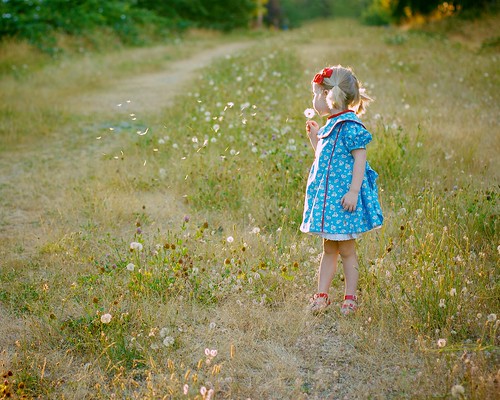
This dress really needs a petticoat.  The dress hangs like a wide sack without it.  Unfortunately, the petticoat I made for the Alice costume was much much too short at this point.  So, I cut off the top and sewed on an elastic band so she could continue wearing it.  The dress would benefit from a full crinoline, though.

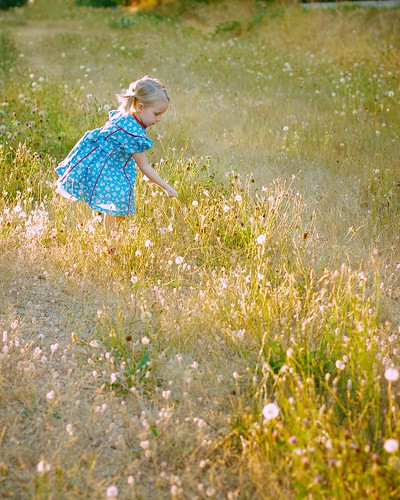
Because working with a vintage pattern wasn't enough of a challenge for me *HA* I decided to make things even harder on myself and add piping.  I've never sewn with piping before...ever.  I didn't have any red piping so I decided to make some.  I also had no cording, but I remember reading online somewhere that ladies used to use yarn, so I raided my stash and found some nice kitchen cotton to use.  See, I told you I like to make things hard on myself!

The piping making process was really straightforward.  I cut strips of fabric on the bias, folded it over my yarn and used my zipper foot to sew right up next to the yarn.  Then you sandwich your piping in between your two pieces of fabric and sew them together, again using your piping foot.


I love the way the whole thing turned out.  I now want to pipe everything under the sun.  Piping on pillows?  Yes please!  Piping on skirts?  Of course!  Piping on t shirts?  Why not?  Piping is awesome!

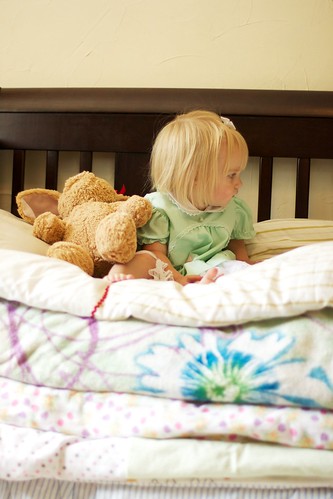
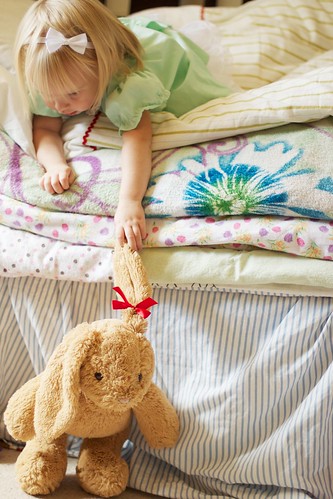
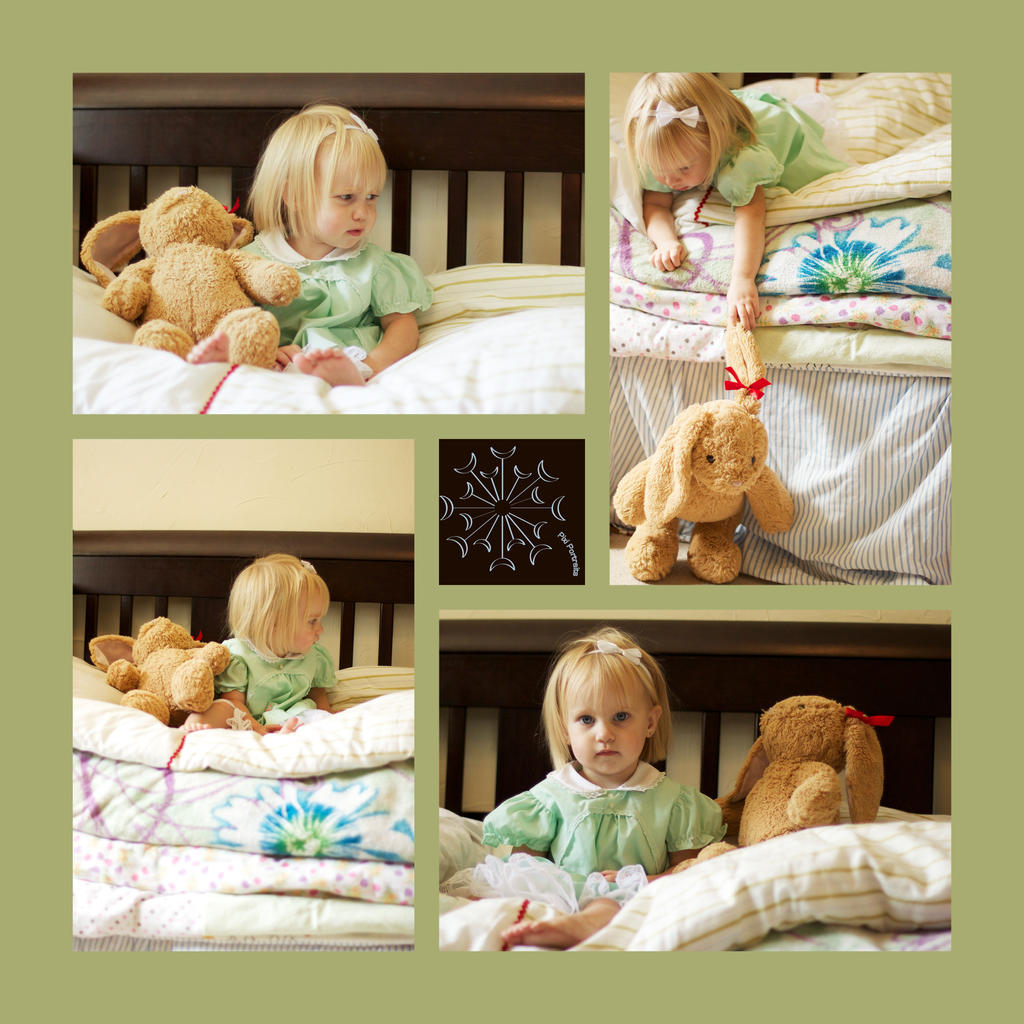
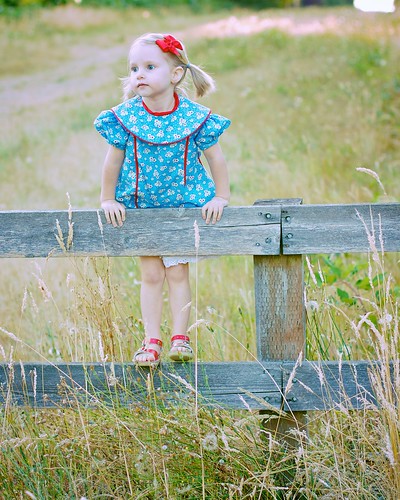
So, since I loved the dress and the piping and the sun was gorgeous, Miss and I took a photo walk last night.  Here is her vintage dress...and her pig tails.

Vintage Dress

Vintage Dress

Vintage Dress

Vintage Dress

Clicking on the photos will take you to my flickr photostream.  There are more photos from the shoot there.


Wednesday, July 24, 2013

Princess and the Pea

Here is another flashback for you.  These were taken almost 2 years ago.  I was inspired by a lot of fairy tale themed shoots.  I can't remember if there was a particular photo that made me thing to do Princess and the Pea or not.  It was quite some time ago that I got the idea in my head.  I think the true turning point was a photo posted by a friend of mine.  She took some fabulous photos of her daughter dressed as Snow White.

I also had a vintage dress I had to photograph before it became too short.  I figured I'd kill two birds with one stone and do a fairy tale shoot and a vintage dress shoot.

I had to wait for a day with decent light and a convenient time.  I think I waited a month before I was able to get my shots in.  I found a vintage dress in the closet so that I could kill two birds with one stone: vintage dress photos and fairy tale photos.

princesspea 4
She insisted on having Emma with her.  She and Emma were quite inseparable.  She is still very attached, but mostly at bed time.  Emma is rarely carted around anymore.

princesspea 2

princesspea 3

princesspea 1
She was a very unhappy and sleepy princess.  Just like the real thing.


Tuesday, July 23, 2013

Roller Skate Flip Winners

Flip This Pattern Father's Fantastic Five 

Frances Suzanne announced this month's sew along winners today. Imagine my surprise to see myself featured! Her dad chose my entry as one of his favorites. There were so many fabulous contributions, 45 in all. If you haven't taken a look, pop over and see the amazing creativity.

Thanks, for having such a fun sew along, Frances Suzanne! Thanks, "Dad", for choosing my top. Next month is the Tinny dress, as pattern that I have in my stash. I think I'll enter next month too. I have another project to post soon, but this week has been busy between the Roller Skate flip and KCW and shampooing my carpets and rearranging my house...

Tuesday, July 16, 2013

Flip This Pattern : Oliver + S roller skate dress and tunic

Flip This Pattern

I love Flip this Pattern.  The creativity that I see is so inspiring.  It's great to see how people can make a pattern truly their own by changing small details or adding embellishments.  Frances Suzanne's blog is always amazing.  The way she adds such a personal touch to everything never ceases to amaze me.

When I saw the roller skate dress from Oliver + S, I saw a great deal of potential.  It's practically a blank slate.  I changed the neckline to add a tie and I thought about dropping the elastic down to make it gather at the hip, but I don't find that the most flattering shape and the fabric doesn't have enough drape.    It's a cute little tunic that I think will work well for late summer and early fall.

ETA*  The neck ties were lengthened at least 8 inches.  I'd have to go dig through my bin to find the pattern piece I drafted.  I also snipped the front center and then folded the edges under to make a V notch in the front so that it would be finished and have a bit of slack for tying the ties.


blue and grey

This tunic is actually the size 6-12 month dress.  It fits great now, but I'm not sure how well it will fit in a few months.  Maybe I should have gone with the 12-18?

I also made the knickers.  I'll post about those another time.

I'm not sure if I like the neck tied like a tie or tied in a bow.  I guess we can wear it both way.

blue and greyblue and grey


Perfect for cooler fall days and reading a book.


blue and grey

Friday, July 12, 2013

Kids Clothes Week Summer

I've often followed Kids Clothes Week, but I've never officially participated.  I did quite a few things during and after the spring challenge.  It's what really gave me the kick in the pants to just jump in and get it done.  This time around, however, I plan on actually signing up.

KCWC

I love the new website for it where you can sign in and upload all of your project info!  It's so easy to navigate and share.  I'm really excited for the kickoff on Sunday!

Miss really doesn't need much in the way of summer clothes anymore so I plan on working on her Fall transition wardrobe.  I have some shorts and knickers and tunics planned out.  I've started printing patterns and coordinating fabrics already.  Is that against the rules?  I figure if I'm supposed to spend an hour sewing each night, I might as well have things planned out right?

My palette is cool greys, berries, blues and pinks.  We'll see if anything else comes up between now and then.  So, if I'm scarce for the next week, you know why.  Of course, I should have a few projects to post about once I'm done.

Tuesday, July 9, 2013

What Time is It?

Adventure TIME!!!!

The show Adventure Time is a favorite of our family.  All of us can sit and watch it together, ages 3.5 to 35 (ha!  clever coincidence in numbers there).  My daughter is particularly infatuated with it and plays Adventure Time often.  She specifically asked me to make her a "hat like Finn the Human"  Every crafting Mama knows that they can't say no to a request.

Naturally, being the overachiever that I seem to be, a hat wasn't good enough enough.  She also had to have the backpack, and the shirt AND the sword.  At some point time, I can make her a little Jake plush to carry around as well, but that will be another time.  She keeps asking me, though.

The hat was tricky because all the tutorials I found were for adult sizes and even though Miss has a big head, it's not quite adult sized.  I had to hack and slash and do many fittings before I came up with something that didn't look absurd.

Littlest Cosplay
She's more excited than she looks, I swear!  In fact, I've never seen her happier with anything I've made for her.

The backpack was drafted entirely from scratch.  It was actually a pretty simple affair consisting of two circles and a long piece to go around it.  I did have a difficult time finding appropriate colors in the right types of fabric.  I wanted fabric that would be durable and not stretch so that she could actually use the backpack to carry treasures in.  I settled on two green broadcloths which I then fused to lightweight canvas using double sided fusible web.  Now I want to fuse everything!


The opening on the backpack was a bit tricky.  I just overlapped it where the two green piece meet and added some velcro.  It's not the most functional and the whole thing puckers when it's full of heavy things like fairies, rocks, and books.  If I made another one, I'd put a zipper in the top and call it good.


The sword I really had the most fun making.  It reminded me of crafting for my boys when they were little.  I had all kinds of practice at making swords, guns and other such things before Little Miss came along.  Granted, they were usually fashioned out of Elmers glue, old cardboard and toilet paper tubes or legos, but it was still wonderfully fun.


Unlike this sword's predecessors, this one is made from dollar store foam board.  True to it's predecessors, it also rocks a recycled cardboard hilt and paper towel tube for a handle.  The end is a styrofoam ball also from the dollar store.

I put many layers of glue on and let it dry and then layered more glue.  This actually took longer than any other part of the costume, not really because it was labor intensive, but because there was a lot of wait time while it was drying.

After the sword was dry, I painted it with craft acrylics, let it dry and then mod podged the snot out of it...twice.  I painted red circles on the bottom to represent Finn's rubies on his sword.

Littlest CosplayLittlest Cosplay

Unfortunately, you can't see the fun detailing on the sword in these photos.  I used a sharpie to copy all of the scratch marks from the cartoon.  That's part of what makes Finn's sword amazing :)

Littlest Cosplay

Littlest Cosplay

and one more quick cell shot so you can see the sword details.

All photos should be clickable and take you to their original source on flickr or web.stagram.


Friday, July 5, 2013

Tulip Festival in Skagit Valley 2013

The tulip festival is over, but I thought I'd post about it anyway.  This is the second year I've lived near the Skagit Valley.  The tulip festival is one of the highlights of the season.  There are fields of tulips and before that, fields of daffodils.  It's hard to say whether I prefer the tulips or the daffodils.  Later in the season the iris bloom, but I've yet to make it up there to visit.

Last year, I went armed with my trust 50mm but this year I wanted to give my telephoto a try.  I love the compression.  The mountain looks so much bigger and bigger is better!


Last year's tulip festival photos are here.

Tuesday, July 2, 2013

Fourth of July Snafu

You know when you visualize something in your head and you plan it all out and then it just all kind of falls apart on you?  This was one of those things.  I drafted a pattern but I added seam allowance to the sides and not the top and bottom like I should have.  What was I thinking?  I have no idea!

TopThis outfit was heavily inspired by Gap.  This little top was darling with it's stripes and tie in the back.  I loved it!  I wanted it but I though, "No, I can make that."  It turns out that I'm regretting not just buying the darn thing :P


First off, I didn't have any striped fabric and I was trying to save money, so I just painted my own.  It was the first time I'd painted fabric, but I thought it turned out pretty well.  I used masking tape to help get straight lines and then I followed the directions on my textile medium and mixed up my red paint and went to town.  I used a stencil to make the stars on the shorts (which I bought from oshkosh).  It was a lot of fun and I'll probably do more fabric painting in the future.

The fabric paint did make the top very difficult to ruffle!  It was stiff and didn't want to ruffle on the painted parts.  I broke a lot of bobbin threads, but I won in the end!

After I finished this up, literally the next day, there was a fantastic tutorial posted by Ashley from Cherished Bliss on Project Run and Play.  Her version turned out much better than mine and if I had more muslin and red paint left, I'd follow her tutorial and make myself a new top.

My top was much too wide and a good two inches too short.  Since I'd measured precisely, I didn't put elastic in the back but it turns out that I wasn't as precise as I thought.  Honestly, I'm not sure what happened here, but it was a good learning experience for me.

Fourth of July
It looks darling from the back even fi it is more ruffly than I wanted.  The fabric was pretty stiff so it didn't drape at all but stuck out quite far.

Fourth of July
I made my version a halter so it's fairly low in the back.  I may redo the straps and go fully over the shoulder like the original Gap top is.

and now the front and my shameful representation of my poor measuring skills.
Fourth of July
It's almost a belly shirt!  Some of that is that the fabric doesn't drape well, but a good deal is the fact that I forgot to add in my seam allowance, so it should be a full inch longer.  Oh well, the whole thing only cost about $2 to make and the shorts are still wearable.  I may just find something else for her to wear on the fourth of July and relinquish this to the repurpose pile.  You live and you learn, right?

I love her expression in this photo.  It's almost as if she's asking, "Really?  Are you going to make me go out in public like this?"  Then, she started hopping up and down, the halter came untied and the whole top came down around her ankles.  As I said, learning experience ;)