The dress I made is a size 2 toddler dress from what I believe is the mid 50's. It's a very cute dress and I used vintage print for it as well. The fabric is a reprint feedsack from Windham Fabrics. I'd had the fabric in my stash for over a year. It was so hard to cut into it, but I'm glad I did.
When I tried the finished dress on, my husband said he didn't like the collar. I wasn't sure how I felt about it, so I pulled it off, bound the neck and the collar separately and added a couple snaps to the dress. Now the collar is detachable!
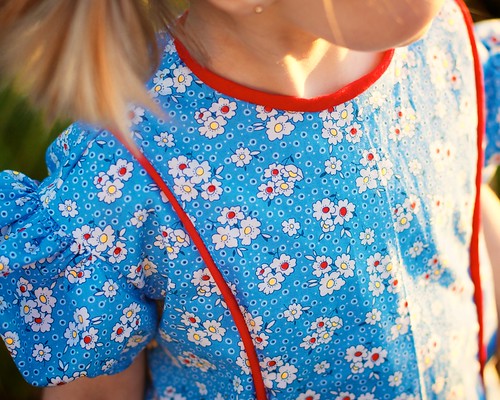
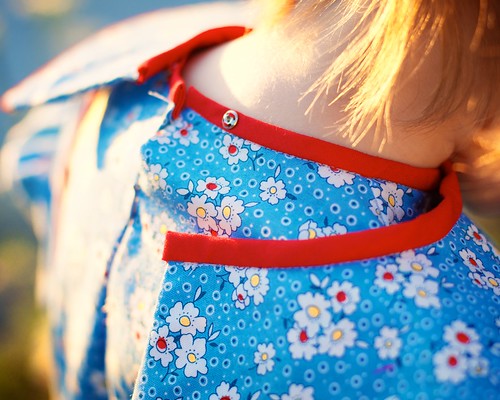
The more I see it with the collar, the more I like it. It helps balance the wide set puffy sleeves. It's very cute without the collar too, though.
Here is a progress shot of the pattern and the layout on my beautiful, beautiful fabric. I still can't believe I cut into it! Butterick 8846
This dress really needs a petticoat. The dress hangs like a wide sack without it. Unfortunately, the petticoat I made for the Alice costume was much much too short at this point. So, I cut off the top and sewed on an elastic band so she could continue wearing it. The dress would benefit from a full crinoline, though.
Because working with a vintage pattern wasn't enough of a challenge for me *HA* I decided to make things even harder on myself and add piping. I've never sewn with piping before...ever. I didn't have any red piping so I decided to make some. I also had no cording, but I remember reading online somewhere that ladies used to use yarn, so I raided my stash and found some nice kitchen cotton to use. See, I told you I like to make things hard on myself!
The piping making process was really straightforward. I cut strips of fabric on the bias, folded it over my yarn and used my zipper foot to sew right up next to the yarn. Then you sandwich your piping in between your two pieces of fabric and sew them together, again using your piping foot.
I love the way the whole thing turned out. I now want to pipe everything under the sun. Piping on pillows? Yes please! Piping on skirts? Of course! Piping on t shirts? Why not? Piping is awesome!
So, since I loved the dress and the piping and the sun was gorgeous, Miss and I took a photo walk last night. Here is her vintage dress...and her pig tails.
Clicking on the photos will take you to my flickr photostream. There are more photos from the shoot there.

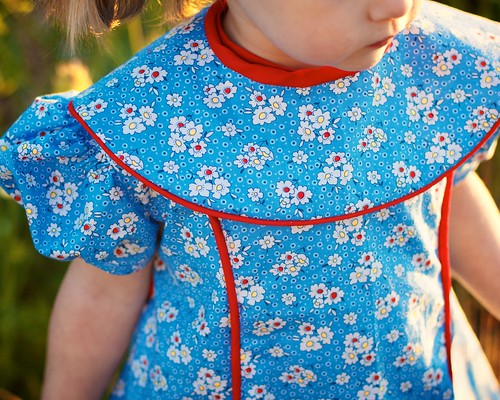






This is the most adorable dress! Love the detachable collar, the piping is perfection, and the fabric is great! Great job on your first vintage pattern.
ReplyDeleteThank you. I am excited to tackle the next vintage pattern, once I figure out how all the holes go together.
ReplyDelete