

Since I found out that I was having a little girl, I've been dreaming of sewing all sorts of adorable things for her. I started off with a tiny little corduroy jumper. I used measurements from another little dress to give me an idea of what the finished dimensions should be. I had a few problems figuring out how to put a lining in it, but it wasn't anything that a seam ripper couldn't fix. All in all, I was proud of my final product.
I learned a few things while making this dress. Very important things like remembering to lock your stitches so that the dress doesn't fall apart the second time it's worn and including a seam allowance while drafting your pattern. Lucky or me, she was smaller than expected and was able to actually fit in the tiny masterpiece.
After all of my seams started coming apart, I started searching the internet to figure out why. Apparently, you should zigzag all of the edges to help hold them together (or buy a serger). Who knew? I sure didn't. This was my first clothing project since I was making sock dresses for my Barbies, and I'm pretty sure I didn't serge the seams on those.
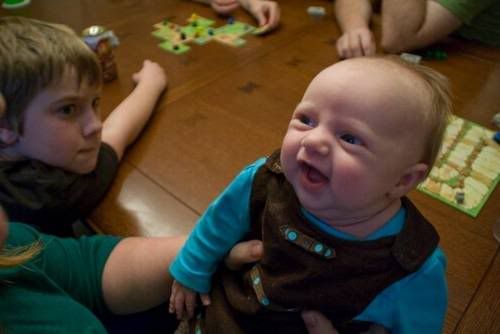
After the first torturous photos (see above) she got a chance to wear the dress in public. We had a family get together for Thanksgiving and she showed off her new duds in front of the whole family. She grew fast enough that this was also her last wearing of the dress.
Armed with knowledge from my first dress, I set off to make another one. I saw some white and red fabric and instantly envisioned a feminine, ruffly dress for this summer. I had such good luck with drafting the pattern for the first one that I decided to try something a little more difficult. Instead of 2 pieces plus a lining, I decided to try a bodice, waistband and skirt with an underskirt for number two.
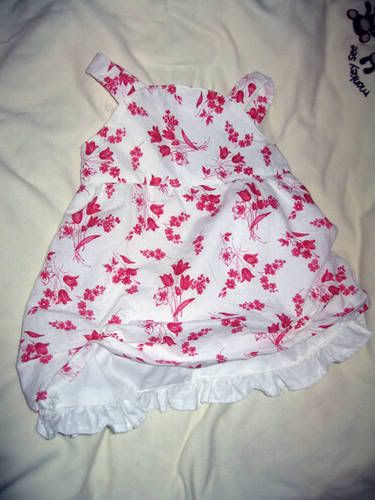
Because I had a new baby, it took me over a week to cut out the pieces. They sat, lovingly stacked, on my craft table for another week. Finally, I pulled them out and started assembling them. Again, I had no real pattern, so I just kind of winged it in assembly. I started with the front bodice section and then realized that I'd have to attach the straps. I whipped out my trusty seam ripper and actually sewed the straps in.
After the bodice was done, I realized the best way to put the lining in would be to sew it to the
bodice and then sew the front and back pieces of the bodice together. So, I pulled out the seam ripper yet again. Finally, the dress was mostly assembled. All I had left were some buttonholes and some hems. I set to work on the final steps.
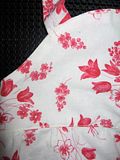
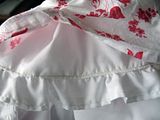
After I hemmed the overskirt, I realized that the whole thing would look better with a ruffle. This was also my first project with ruffles. The entire thing was very enlightening. I cut out strip after strip of white fabric and sewed them together. At some point, apparently, I sewed the seam the other direction so there was no "right" side of the ruffle. Since it was somewhere in the middle, I just left it and hemmed the piece anyway.
After the longest hem I have ever done, I was ready for some ruffling. I did another internet search to make sure I had the right idea. I switched the sewing machine to the longest straight stitch it would do and turned the tension all the way down. I sewed down .... you guessed it... the hem! I don't know what I was thinking, or how it happened, but I wasn't paying attention and I sewed the straight stitch right down my hem. Again, out came the seam ripper and I started over. This time on the opposite end from the hem.
When it came time to start ruffling, I looked for the tail and pulled. Nothing happened. I looked for the other tail and pulled. Still nothing! What in the world?! turns out, that wasn't the loosest tension setting, it was the tightest. Luckily, I didn't need the seam ripper this time. Just a quick twist of the dial (this time REALLY the loosest setting) and I sewed just under the first stitch. This time, when I pulled the string it ruffled. It was a thing of beauty!
Once I had the ruffle arrange, it was time to sew it on! I was almost done at this point and so excited to show off my final project, but it was time to go to bed. I pinned the ruffle to the bottom of the underskirt and set it on my table hoping to get to it at the next nap. I went to bed, envisioning my daughter wearing her dress this summer.
I think close to two weeks went by before I got a chance to sew the final ruffle onto the dress. I finally was able to go downstairs and finish during an afternoon nap. I set up the sewing table and turned on the lights and went to work. The machine hummed away while I hemmed and then finished my seam with a zigzag stitch. I was finally done! I held up the dress to admire it only to find out I'd sewed the ruffle on inside out! The hem of the ruffle was on the outside of the dress.
Devastated, I set the dress aside and went upstairs to figure out how best to solve the problem. Since I'd already finished the seams and topstitched the ruffle down, I had no idea how to get the ruffle off with a seam ripper. I tried it, but the effort was futile. There was just too much seam to rip and the fabric wasn't going to hold up. Finally, I just decided to use my scissors and cut the whole thing apart and try again. I pulled everything apart and repinned the dress, this time double-checking that I put it together properly.
I was really done this time and the dress didn't look any worse for a shortening of the underskirt. I'd made sure to finish all my seams and topstich everything. I was so pleased with the final project that I decided to buy myself some new fabric for the next project.

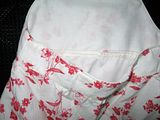
Actually, it's still not finished. I still need to add buttons to the back and buttonholes to the straps, but my adventures with buttonholes might be another blog entry itself!