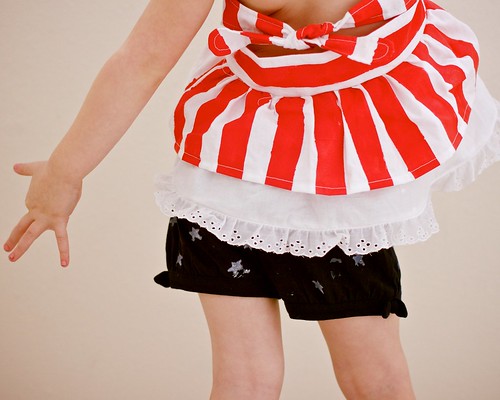
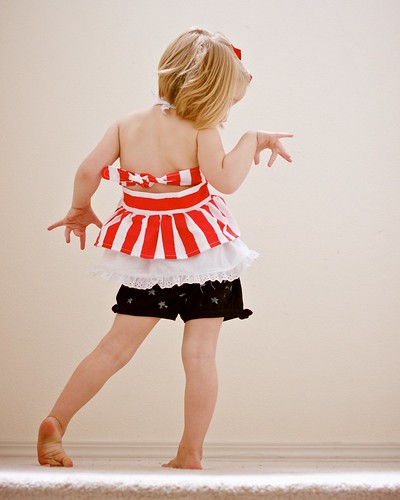
 This outfit was heavily inspired by Gap. This little top was darling with it's stripes and tie in the back. I loved it! I wanted it but I though, "No, I can make that." It turns out that I'm regretting not just buying the darn thing :P
First off, I didn't have any striped fabric and I was trying to save money, so I just painted my own. It was the first time I'd painted fabric, but I thought it turned out pretty well. I used masking tape to help get straight lines and then I followed the directions on my textile medium and mixed up my red paint and went to town. I used a stencil to make the stars on the shorts (which I bought from oshkosh). It was a lot of fun and I'll probably do more fabric painting in the future.
The fabric paint did make the top very difficult to ruffle! It was stiff and didn't want to ruffle on the painted parts. I broke a lot of bobbin threads, but I won in the end!
After I finished this up, literally the next day, there was a fantastic tutorial posted by Ashley from Cherished Bliss on Project Run and Play. Her version turned out much better than mine and if I had more muslin and red paint left, I'd follow her tutorial and make myself a new top.
My top was much too wide and a good two inches too short. Since I'd measured precisely, I didn't put elastic in the back but it turns out that I wasn't as precise as I thought. Honestly, I'm not sure what happened here, but it was a good learning experience for me.
I love her expression in this photo. It's almost as if she's asking, "Really? Are you going to make me go out in public like this?" Then, she started hopping up and down, the halter came untied and the whole top came down around her ankles. As I said, learning experience ;)
The fabric paint did make the top very difficult to ruffle! It was stiff and didn't want to ruffle on the painted parts. I broke a lot of bobbin threads, but I won in the end!
After I finished this up, literally the next day, there was a fantastic tutorial posted by Ashley from Cherished Bliss on Project Run and Play. Her version turned out much better than mine and if I had more muslin and red paint left, I'd follow her tutorial and make myself a new top.
My top was much too wide and a good two inches too short. Since I'd measured precisely, I didn't put elastic in the back but it turns out that I wasn't as precise as I thought. Honestly, I'm not sure what happened here, but it was a good learning experience for me.
It looks darling from the back even fi it is more ruffly than I wanted. The fabric was pretty stiff so it didn't drape at all but stuck out quite far.
I made my version a halter so it's fairly low in the back. I may redo the straps and go fully over the shoulder like the original Gap top is.
and now the front and my shameful representation of my poor measuring skills.
It's almost a belly shirt! Some of that is that the fabric doesn't drape well, but a good deal is the fact that I forgot to add in my seam allowance, so it should be a full inch longer. Oh well, the whole thing only cost about $2 to make and the shorts are still wearable. I may just find something else for her to wear on the fourth of July and relinquish this to the repurpose pile. You live and you learn, right?I love her expression in this photo. It's almost as if she's asking, "Really? Are you going to make me go out in public like this?" Then, she started hopping up and down, the halter came untied and the whole top came down around her ankles. As I said, learning experience ;)


No comments:
Post a Comment