
What I really loved about this dress is how the tone on tone and the simple styling are perked up by good texture. The wide bands with pintucks and large chunky buttons help the simple style really shine through without making it boring.


I tried the double needle technique but, for the life of me, I couldn't get it to work. I imagine it's the same reason I can't get my brother machine to shirr. I'm afraid to adjust my bobbin tension because I know I won't get it back to the factory setting. So, until I buy a new bobbin case, I'm stuck pintucking the old fashioned way.
This burdastyle tutorial was very informative. Yeah, it's labor intensive, but it's worth it. In fact, I plan on more pintucked projects in the future. In fact, I found it rather fun :)


I recommend pressing and sewing all the tucks going one direction all at the same time rather than going back and forth. The first piece I did the back and forth method and it was much more time consuming than the next four pieces which I did all one way and then the other. Really, it didn't take as much time as I expected, probably because I spaced each set a good five inches apart.
First off, I drafted my pattern which was just a bunch of different rectangles. Add two inches to each dimension to accomodate for pintucks. I pintucked all of my pieces and sewed them up and then cut them to the right dimensions, not forgetting seam allowance.
The whole thing is sewn with osnaburge. It had good visual texture and was thin enough to show the pintucks nicely. I had to dye the skirt section to make it darker, using rit dye.
I threw a buttonhole on the back so that I could get the skirt off and on and buttonholes on the front for the straps, sewed on my pockets and did a dance. My knockoff was complete.
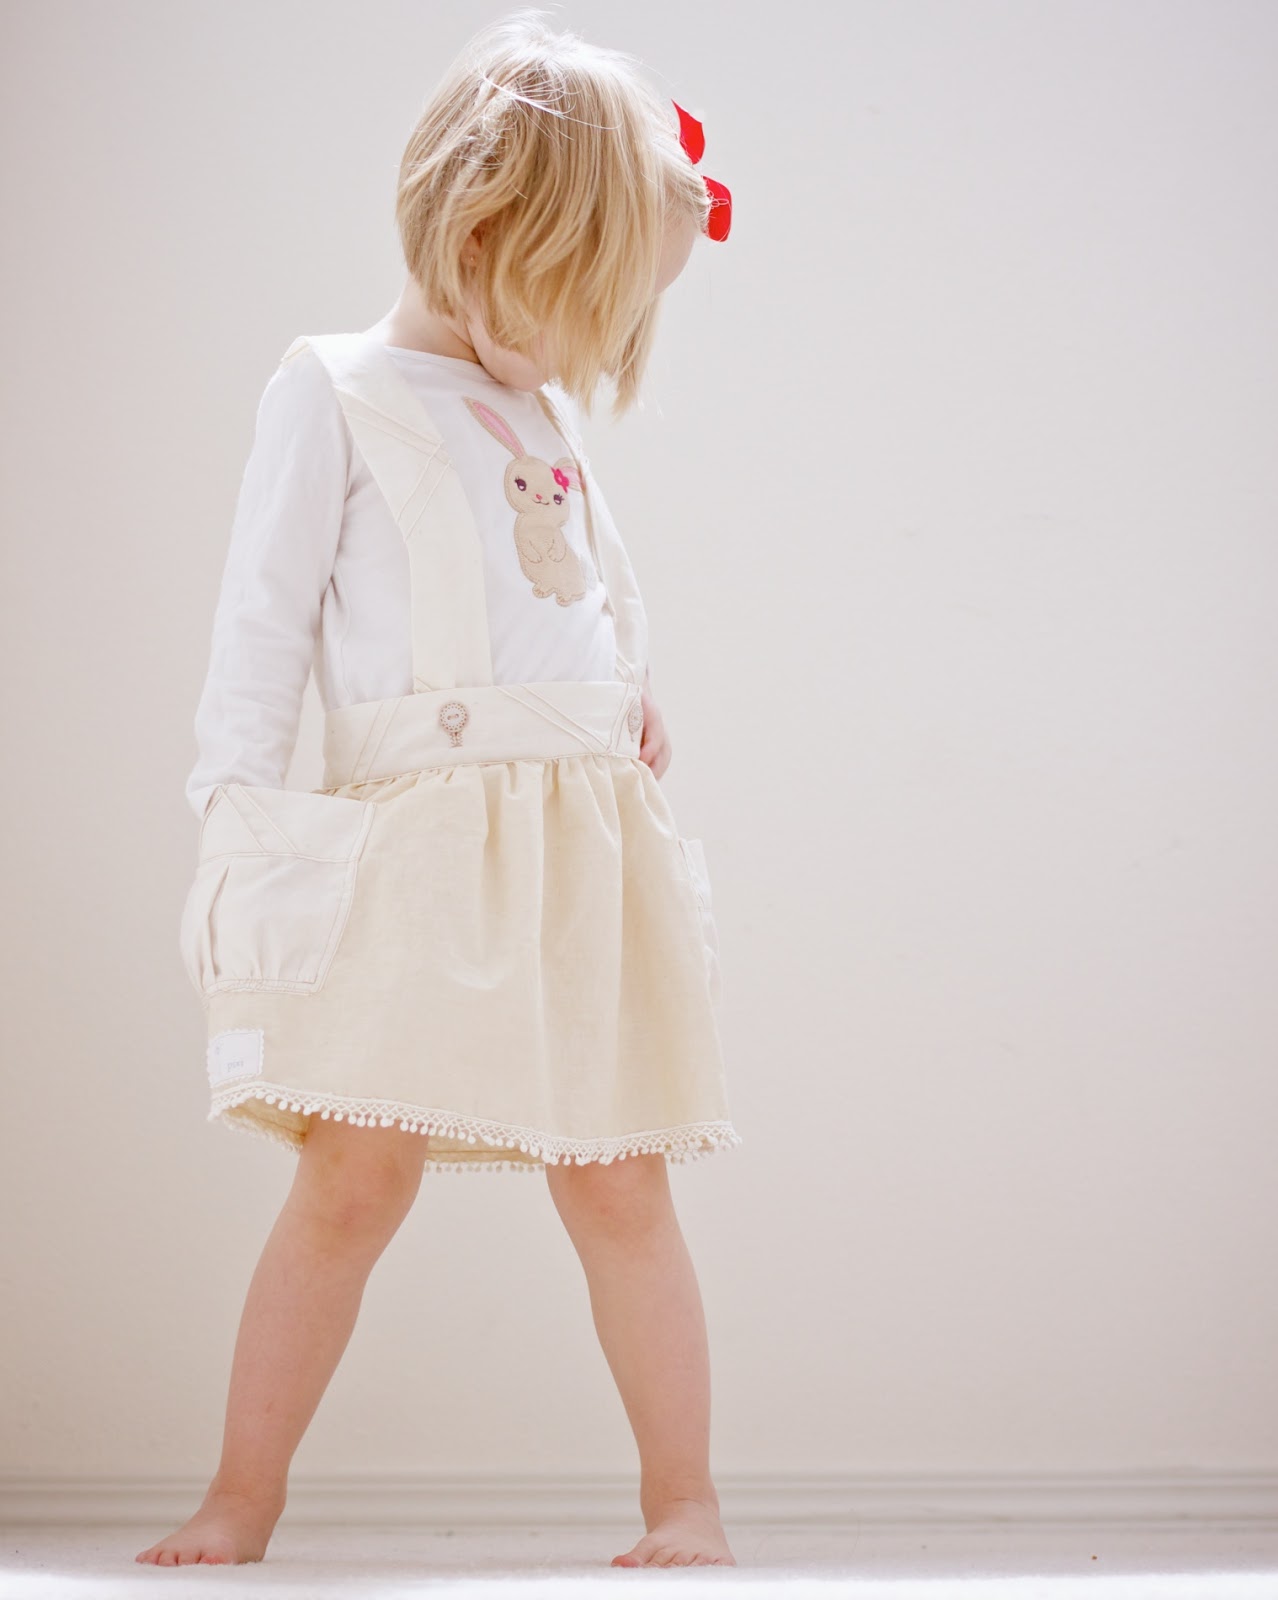

I added some pom pom trim to the bottom.
It turns out it doesn't fit too well, though. It's about a size too big, but she'll grow into it :)
I couldn't find the right buttons so I made my own from shrink plastic. I used this tutorial.
I couldn't find the right buttons so I made my own from shrink plastic. I used this tutorial.

PRECIOUS!!!!!!!!!!!!!!!!!!!!!
ReplyDelete